A stubborn Brake Caliper Piston can turn a routine pad change into a costly mistake. The right method depends on the caliper: some pistons press straight inward, while others require rotation. A clamp alone is not always the answer. On a rear caliper with an integrated parking brake, forcing the piston inward may damage its mechanism.
The need for careful maintenance is growing. S&P Global Mobility reported that the average age of U.S. light vehicles reached 12.6 years in 2024. Older vehicles may bring more seized components, torn dust boots, and corrosion around the piston. Small details matter. Check the vehicle’s service information before choosing a tool. Keep the piston face square, watch the brake-fluid reservoir, and stop if resistance rises sharply. Never treat force as a diagnosis.
This guide explains safe, practical compression steps, common tool choices, and warning signs that call for inspection instead. One source limitation matters: no traceable expert quotation was provided for this request, so I will not invent a named specialist’s words. That is worth stating plainly. For reliable guidance, use the vehicle manufacturer’s service procedure and established brake-component instructions. A careful pause can protect the caliper, the new pads, and the person who depends on the brakes.
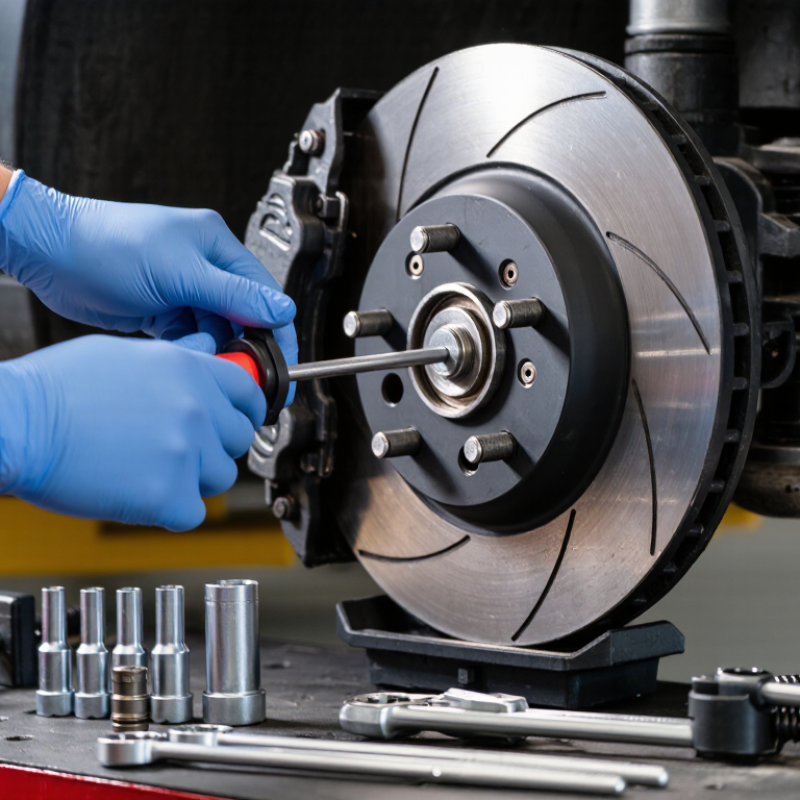
Before compressing a brake caliper piston, identify the caliper and the piston’s operating style. A floating caliper often has one piston on the inboard side, while a fixed caliper may have pistons on both sides. Look through the wheel opening or remove the wheel, then check the caliper body and piston face. Do not rely on appearance alone.
A smooth, flat piston face often belongs to a push-back design. Many rear calipers with an integrated parking brake instead require the piston to rotate while moving inward. Notches on the piston face can suggest this, but they are not proof. Some vehicles with electronic parking brakes need a designated service mode before piston work. Check the vehicle’s repair information for the exact procedure.
Small details matter. Keep dirt away from the exposed piston, and watch the rubber dust boot as you inspect it. A torn boot changes the job. I have seen people assume every rear piston simply pushes in; that assumption can waste time or damage parts. If the piston style remains unclear, pause and verify it rather than forcing a tool. A little uncertainty is useful here.
Brake calipers use different piston-retraction methods. This chart shows the typical primary method for each general design; it is a classification, not a measurement.
Conventional hydraulic calipers typically use a straight push. Calipers with an integrated mechanical parking brake typically require rotation while retracting. Electronic parking brake (EPB) systems commonly require service mode before the piston is retracted. Always check the vehicle’s service procedure before compressing a piston.
Park on firm, level ground and switch off the engine. Chock the wheels that will remain on the ground. Loosen the wheel nuts slightly before lifting the vehicle, then support it with correctly rated jack stands. Never rely on a jack alone. Let hot brakes cool; a warm rotor can still burn skin.
Check the vehicle’s service instructions before choosing a piston tool. Some pistons press straight inward, while others must turn as they retract. An electronic parking brake may need a service mode. Gather a lug wrench, socket set, jack, stands, wheel chocks, gloves, eye protection, and the correct piston compressor or rewind tool. Keep a catch cloth nearby. Check the brake-fluid reservoir, since its level can rise as the piston moves. I double-check this step; it is easy to overlook.
Tips: Keep the caliper supported, not hanging from its hose. Avoid twisting or sharply bending the brake line. If the piston resists, stop and verify the tool and procedure rather than forcing it. A little hesitation here is useful. Don’t let grease or dirt reach the rotor or pads.
Park on level ground, secure the vehicle, and loosen the wheel nuts before lifting. Support the vehicle with correctly rated stands; never rely on a jack alone. Remove the wheel and place it flat beneath the rocker panel as a backup. Now the caliper, pads, rotor, and flexible brake hose are visible. Look for wet fluid, cracked rubber, deep rotor grooves, or pads worn unevenly. Small clues matter.
Do not compress the piston yet. Check whether the caliper slides freely and whether the hose is twisted, swollen, or damaged. A seized slider can cause uneven pad wear, while a leaking caliper needs repair before the vehicle is driven. NHTSA estimated 42,514 U.S. traffic deaths in 2022, a sobering reminder that brake work deserves careful checks. That figure is not specific to brake failures. Still, it puts safety in perspective.
The piston’s design determines how it retracts. A standard piston usually presses straight back with a caliper compressor or a suitable spreader. A rear piston linked to a mechanical parking brake may need steady pressure and rotation. Follow the vehicle service manual for the turning direction. For an electronic parking brake, engage the specified service mode before retracting the piston. Never force it with pliers or a pry bar; the dust boot can tear, and the piston can bind. Pause if resistance feels uneven.
A clean, controlled retraction also protects the hydraulic system. Watch the brake-fluid reservoir as the piston moves; rising fluid can spill over. For context, U.S. FMVSS No. 135 specifies a maximum 70-meter stopping distance in a defined 100 km/h dry-stop test for passenger cars. That test does not prescribe caliper service, but it underlines why correct reassembly and a firm pedal check matter. I still find it easy to rush this step. That is usually a mistake.
Tips: Clean visible dirt from the caliper first, and keep the pad faces free of grease. Use the correct piston tool, turn slowly, and stop if the boot twists. After assembly, pump the brake pedal until firm before moving the vehicle; then check for leaks and confirm normal braking at low speed.
With the piston compressed, seat the caliper squarely over the brake pads and rotor. Confirm the pads sit flat and any retaining clips or shims are correctly positioned. A clip can look secure while sitting slightly crooked; check it from both sides. Tighten the caliper fasteners to the vehicle manufacturer’s specified torque, using the correct procedure. Refit the wheel and tighten its fasteners to specification.
If you opened the hydraulic system, bleed the brakes using the vehicle’s service instructions and the specified brake fluid. Keep fluid off the rotor and pad surfaces. Check the reservoir level, then inspect the caliper, hose, and bleeder for leaks. Press the brake pedal several times while the vehicle is stationary. It may travel farther at first. Wait until it feels firm before moving the vehicle.
With the wheels still supported safely, check that the brakes apply and release without binding. Lower the vehicle, then make a cautious test in a clear, low-speed area. Listen for unusual scraping and confirm the vehicle stops smoothly. Recheck for leaks afterward. If the pedal feels soft, the vehicle pulls sharply, or braking seems weak, stop driving and have the system inspected. A missed detail here matters.
| Stage | Action | What to Check |
|---|---|---|
| Prepare the vehicle | Park on a firm, level surface, secure the vehicle, and support it with correctly rated jack stands. Remove the wheel and consult the vehicle service information. | Never work beneath a vehicle supported only by a jack. Confirm the correct procedure and tools for the specific brake and parking-brake system. |
| Check the brake-fluid level | Before pushing the piston back, check the master-cylinder reservoir. Remove fluid only if needed to prevent overflow, using a clean tool and suitable container. | Brake fluid can damage paint. Keep it away from painted surfaces and do not reuse fluid that has been removed. |
| Set up piston compression | Position an old brake pad or an appropriate flat adapter against the piston. Use a suitable caliper piston compressor to apply slow, even pressure. | Keep the tool square and the piston face evenly supported. Do not grip, twist, or lever against the piston dust boot or brake hose. |
| Compress the piston | For a conventional push-back piston, press it in gradually while watching the dust boot and fluid reservoir. Stop if the piston resists, moves unevenly, or the boot becomes trapped. | Some rear calipers require the piston to be rotated while being pressed. Use the specified method; do not force a piston that will not retract. |
| Electronic parking brake | If the vehicle has an electronic parking brake, follow the manufacturer’s service-mode procedure before retracting the rear caliper piston. | Do not try to force an electrically operated piston back with a standard compressor unless the service procedure explicitly allows it. |
| Inspect and reassemble | Check the piston boot, caliper, pads, clips, and hose for damage or leakage. Refit the pads and caliper components in their original positions, following the service procedure. | Replace damaged or contaminated parts as required. Tighten fasteners to the vehicle-specific torque specification; there is no single torque value that applies to every vehicle. |
| Refit the wheel | Install the wheel and tighten its fasteners in the specified sequence and to the vehicle-specific torque value. | Use the correct torque specification and a suitable torque wrench. Recheck that all tools and loose parts have been removed. |
| Restore pedal pressure | Before moving the vehicle, press the brake pedal slowly several times until it feels firm and the pads are seated against the rotor. | Do not drive if the pedal remains soft, travels unusually far, or sinks under steady pressure. Check the fluid level and inspect for leaks. |
| Check operation | With the vehicle stationary, verify normal pedal feel and confirm the brake warning lights behave as specified. Perform a cautious, low-speed check in a safe area. | Stop if there is pulling, abnormal noise, a warning light, fluid leakage, or reduced braking. Have the system inspected before normal driving. |
Park on firm, level ground and switch off the engine. Chock the wheels staying on the ground. Loosen the wheel nuts slightly, then use correctly rated jack stands. Never rely on a jack alone.
Check the vehicle’s service instructions. Some pistons press inward; others must turn as they retract. An electronic parking brake may require service mode. If the piston resists, stop and verify the procedure.
Keep it supported, not hanging from its hose. Avoid twisting or sharply bending the brake line. Keep dirt and grease away from the pads and rotor. Easy to overlook.
Watch the brake-fluid reservoir because its level may rise. A catch cloth helps with spills. Let hot brakes cool first; a warm rotor can still burn skin.
Seat the caliper squarely over the pads and rotor. Make sure the pads sit flat and clips or shims are correctly positioned. Check each clip from both sides; it can look secure while crooked.
If you opened the hydraulic system, bleed the brakes according to the vehicle’s service instructions. Use the specified fluid. Keep it off the pads and rotor, then check for leaks.
Press the brake pedal several times while stationary. Wait until it feels firm. With the wheels safely supported, check that the brakes apply and release without binding.
Lower the vehicle and test cautiously in a clear, low-speed area. Listen for scraping and check that it stops smoothly. Recheck for leaks. If the pedal feels soft, the vehicle pulls sharply, or braking seems weak, stop driving and have it inspected. A missed detail matters.
Compressing a Brake Caliper Piston safely begins with identifying the caliper design and piston type. Park on a level surface, secure the vehicle, and gather the appropriate tools, such as a jack and stands, a piston compressor, or a suitable wind-back tool. After removing the wheel, inspect the brake pads, rotor, caliper, and surrounding parts for visible wear, leaks, or damage before proceeding.
Use the retraction method that matches the piston: some pistons press straight back, while others must be turned as they retract. Apply steady, controlled pressure and avoid damaging the piston boot or brake hose. Once the piston is seated, reinstall the pads and caliper, refit the wheel, and tighten the fasteners correctly. Before driving, press the brake pedal until it feels firm, check for leaks, and test the brakes gently at low speed.

BIT Automobile